Analytics
Go to Reporting tab -> Analytics
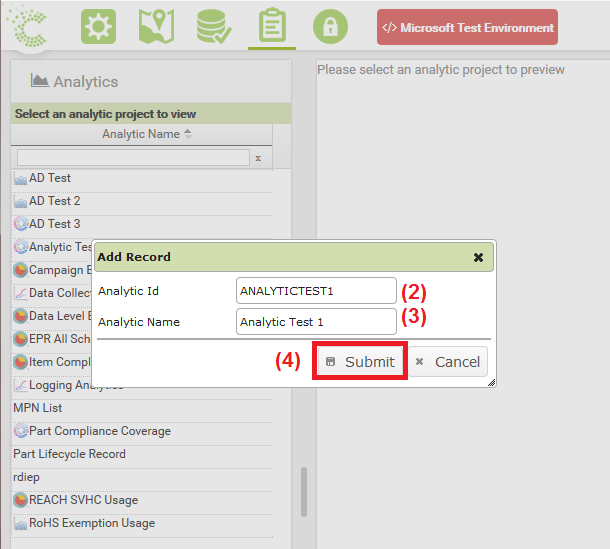
(1) Click the + icon at the bottom of LH pane to create new Analytic
(2) Enter an ID that is unique, does not contain any spaces and is limited to 16 characters
(3) Enter a Name for the Analytic
(4) Press Submit
Click on the newly created Analytic from the list in the LH pane. To create a basic list of MPNs in the system we need to add a table from the database containing that information.
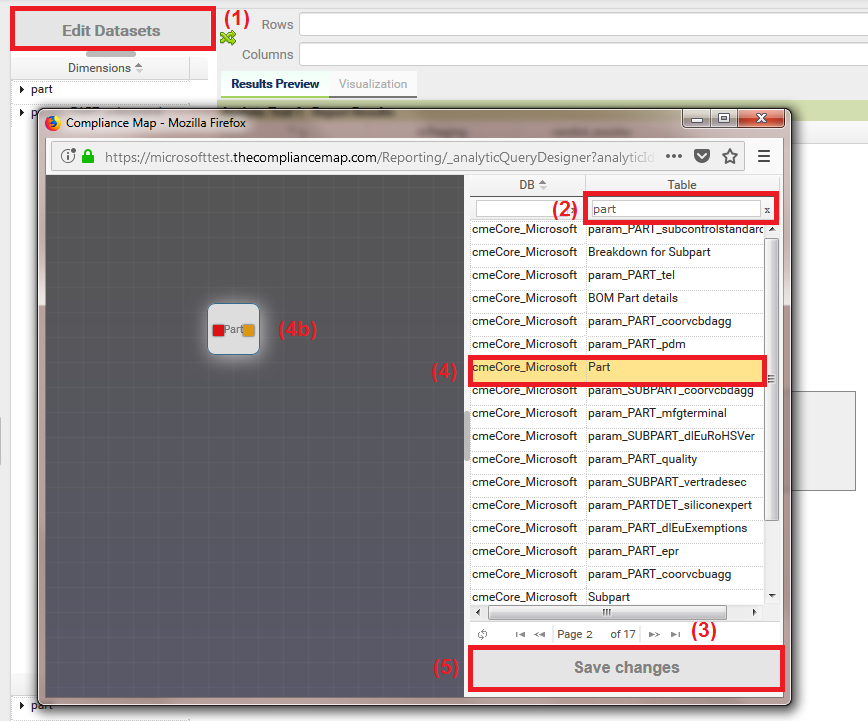
(1) Click on Edit Datasets, a pop-up window will appear
(2) To find the table containing the MPN info type Part into the search box in the Table column
(3) Note there may be numerous pages of results containing the same search string so use the <> controls to find the correct table name if necessary
(4) Highlight the table name and drag into the area to the left (4b)
(5) Press Save Changes and close pop-up window
Next add required fields to the report
(1) Drag Part Description and Part Reference into the Rows section (1b)
(2) Press Refresh
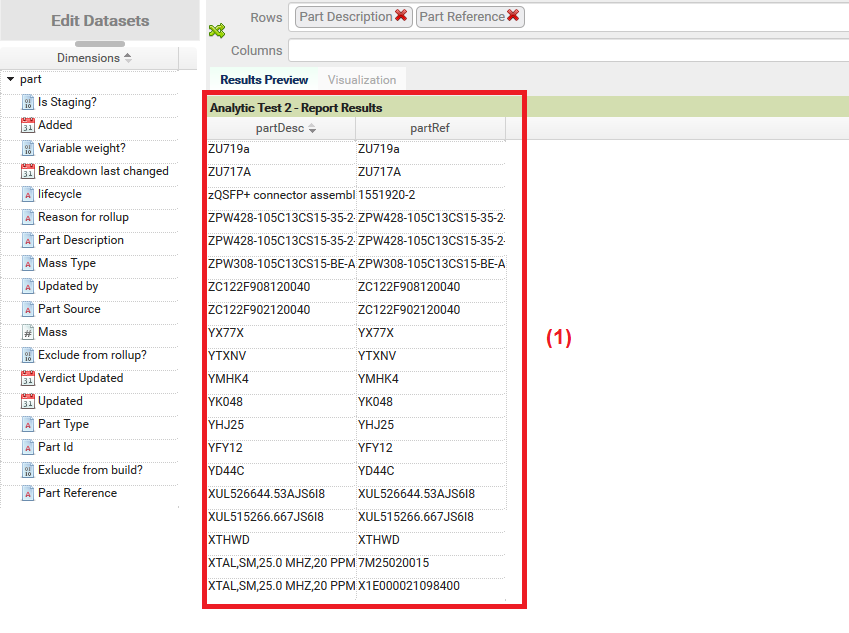
After refreshing the report results can be viewed as below
(1) The Result columns can now be seen in the centre grid
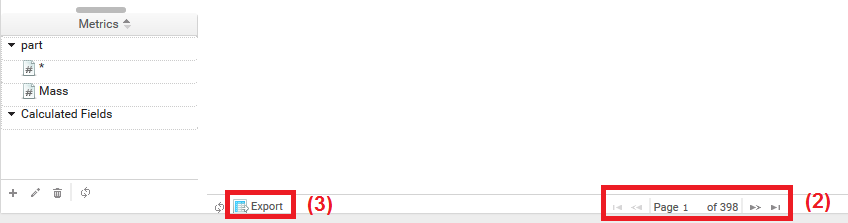
(2) There may be more than 1 page of results, you can tab through the pages using the <> controls
(3) You can export this information to Excel using the Export icon at the bottom of the page if required
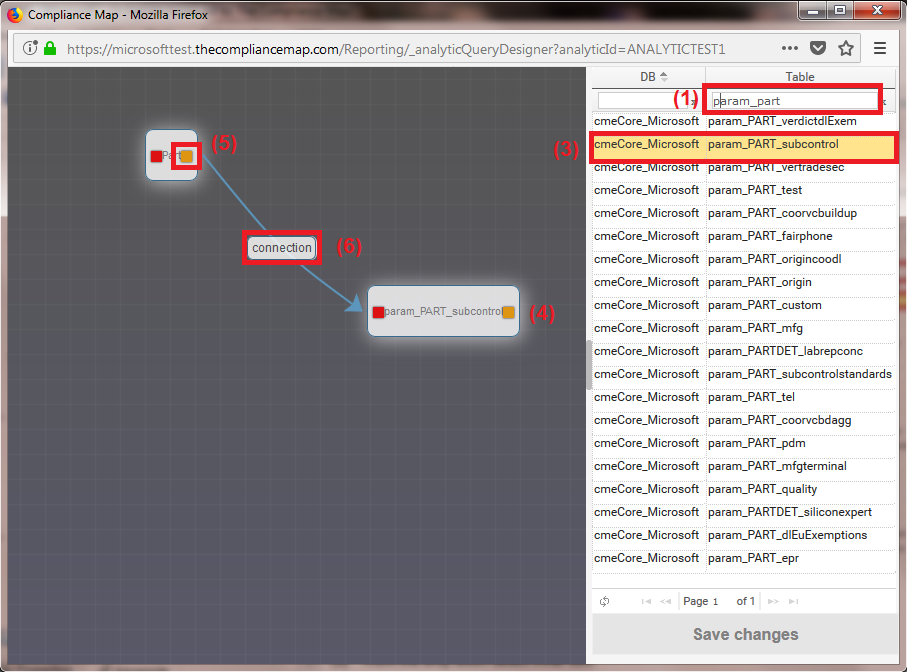
To create an analytic report in the form of a Visualisation that will show the Compliance for all Parts the existing report needs to be taken a stage further. To do that add a further table to the report;
(1) Click on Edit Datasets, a pop-up window will appear
(2) To find the table containing the MPN Compliance info type Param_Part into the search box in the Table column
(3) Highlight param_PART_subcontrol and drag into the area to the left
(4) The selected table will now display in the report canvas
(5) Click on the orange square within the Part table and drag the connection over to the param_PART_subcontrol table which will establish a join
(6) Click on the Connection button
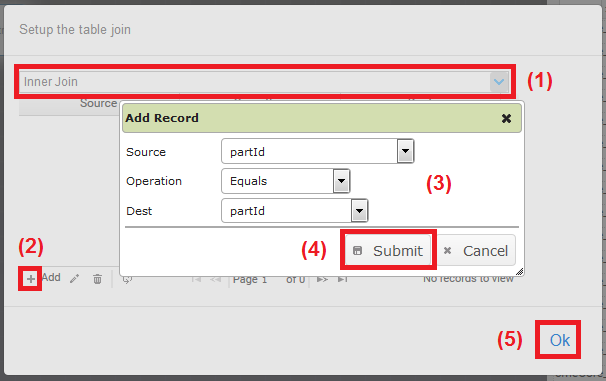
A dialogue box will appear
(1) From the drop down select Inner Join
(2) Press the + icon after which a further pop-up window will appear
(3) Set values in the Source, operation and Dest drop-downs as partId = partId
(4) Press Submit
(5) Press Ok, dialogue box will close
Close the Edit Datasets pop-up window, you will now observe that the previously selected fields have been reset
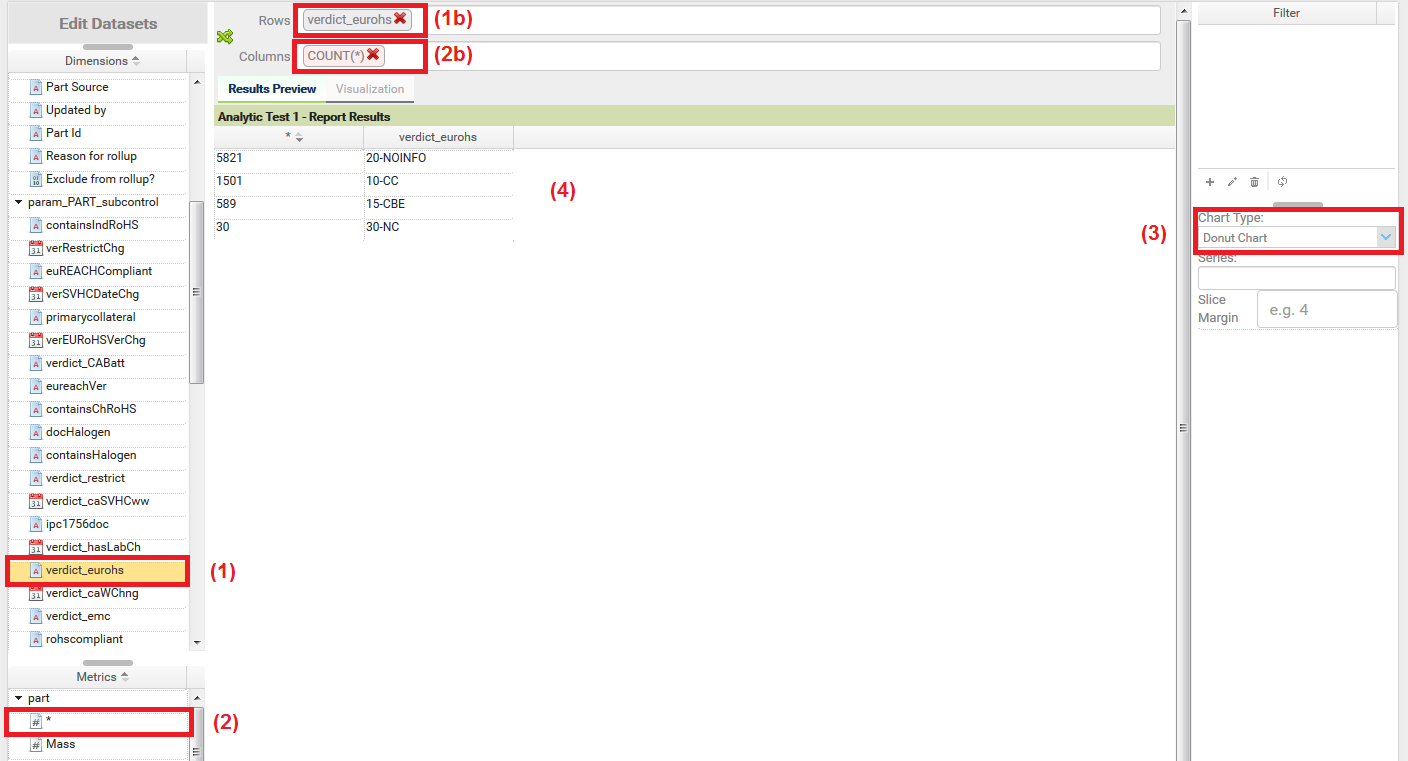
The fields can be selected as follows;
(1) Drag the verdict_eurohs field into the Rows section (1b)
(2) Drag the COUNT(*) metric into the Columns section (2b)
(3) Select the Chart Type Dount Chart from the drop-down
(4) The resulting dataset will now be displayed
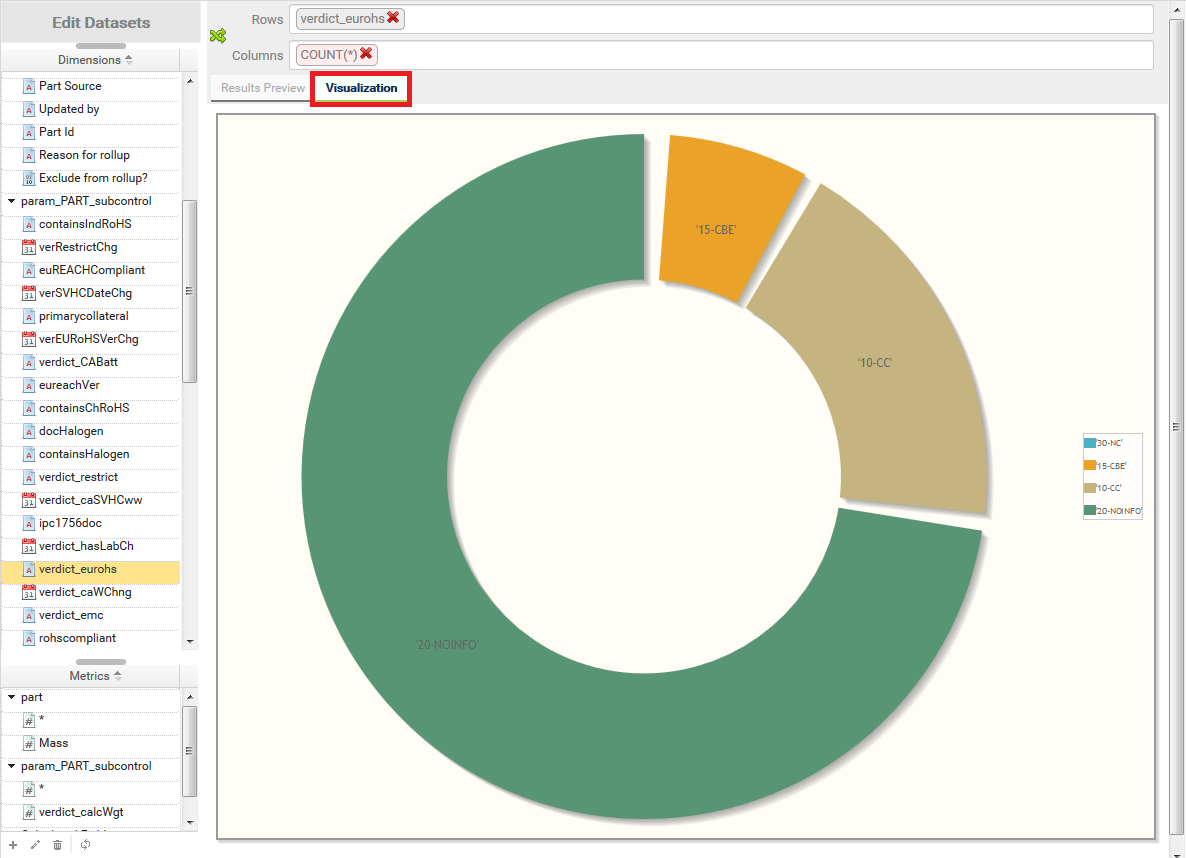
To view the visulisation of the dataset select the Visulisation tab, the donut chart is displayed
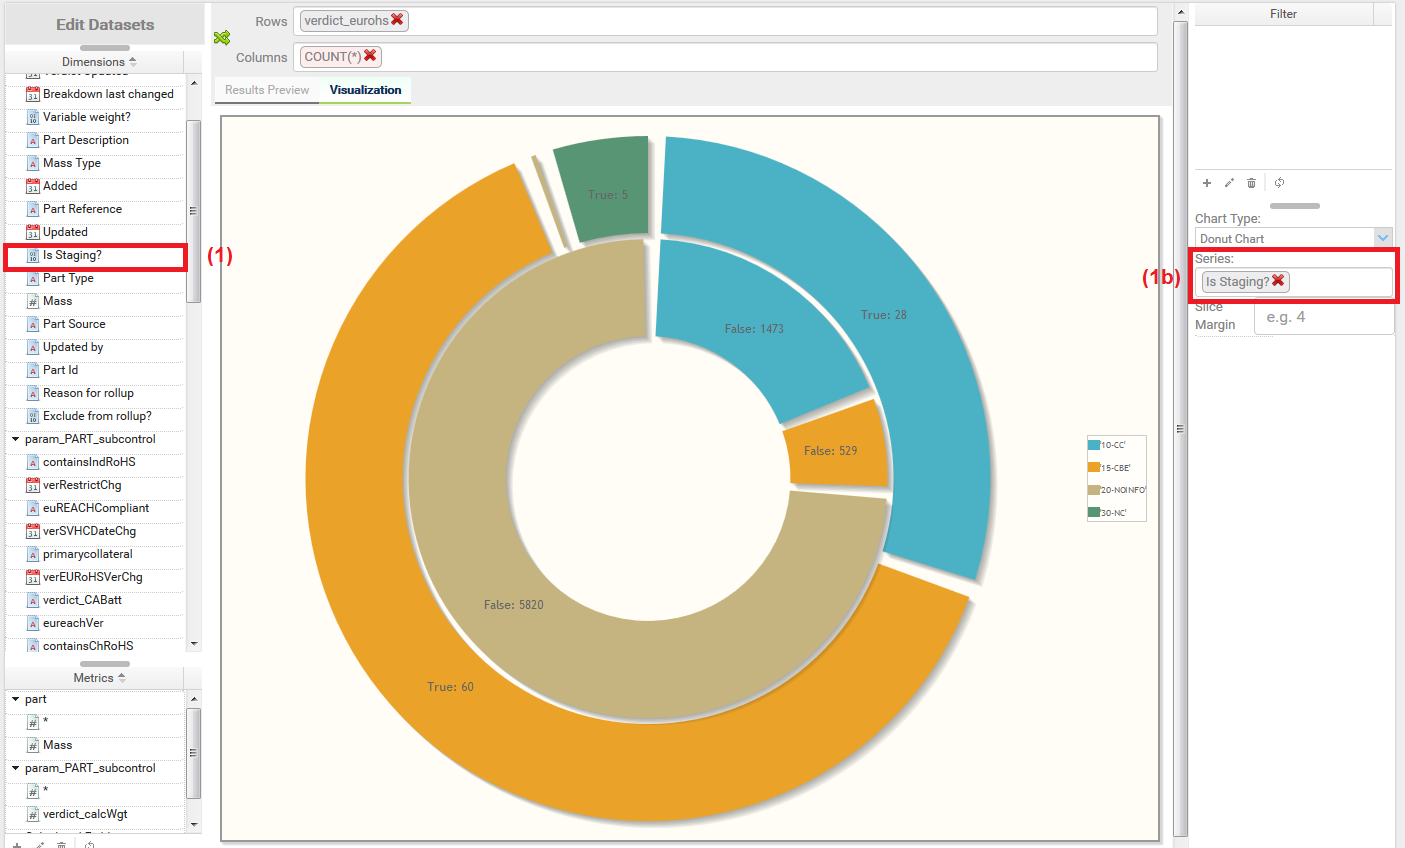
To add the Staged Data series to the chart so that the Compliance values for Staged or non-Staged Parts can be analysed,
(1) Drag the Is Staging? filed into the Series section (1b), press Refresh (not displayed below)
This breaks down into a further ring the breakdown of Staged or non-Staged Part Compliance values